This article is the second in the series of articles by industry veteran Peter Turk. This article focuses on Die Care for Medical Device Extrusion. Please bookmark this space for more great topics.
December 3, 2021
Die Care for Medical Device Extrusion by Peter Turk
Die Care for Medical Device Extrusion by Peter Turk
Possibly the most important area of tooling control to invest time in is with tips and dies. These are the last components (surfaces) that the polymer (tubing) sees before exiting the extrusion head (crosshead), and as such any defects on the tips and dies will leave marks on the tubing. Typically, the defects present as lines on the outside of the tubing from die damage. Internal lines from the tip are also possible, but less likely as tip inspection and care is easier. Tip care will be further investigated in a separate article.
Die lines are especially unacceptable for clear tubing such as those used in making balloons. Not only do the lines not meet visual acceptance requirements, but they have the potential for failure sites (splitting) when tubing is pressurized (expanded). Die lines can also be detrimental to crosslinked tubing due to the same splitting (bursting) during expansion.
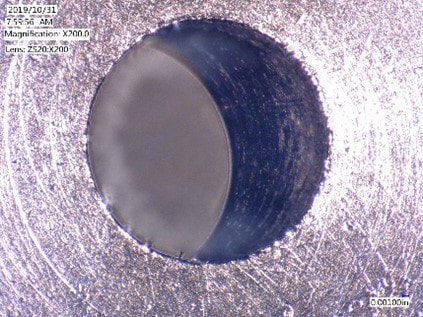
Die inspection and proper care can be a challenge, typically because the die (in many applications) has very small bore and relatively long land length. Finding the correct tool (microscope or camera) to look down the inside of the die is essential. One suggestion is the Keyence VHX that not only has a depth of field capability but allows you to save excellent images that can be imported into an inspection document for go/no-go decisions on die quality. The two most critical aspects of die inspection should be the final land area as well as the die exit (and face). Extrusion dies are usually supplied with a mirror finished flow surfaces (figure a) with no defects. This finish is hard to maintain over the number of cleaning cycles and typical methods used. Any damage in the final land will show up on the surface of the tubing. A damaged ragged edge (figure b) at the die exit will also compromise the surface quality of the tubing, and potentially lead to die drool buildup.
A major issue with die cleaning is that typically, over time, results in the steel losing its hardness, thus becoming more prone to scratching. This is mostly due to the use of cleaning systems (such as ovens and fluidized beds) that run at high temperatures and will slowly anneal the metal. Additionally, maintaining what is typically an extremely high surface finish (mirror chrome look) is tough down small diameter bores. Q-Tips, which are typically used to get into the back of the die (with a buffing or polishing compound on it) will only fit into larger bores and not allow polishing of the final land.
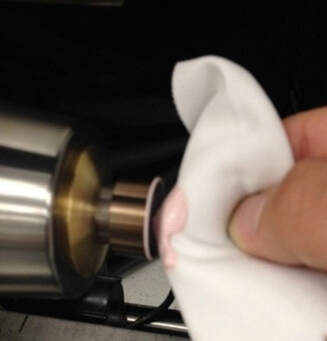
Cleaning and polishing of the die land can be facilitated with the use of a small bench lathe and the use of pin gauges. With the die chucked in the lathe and spinning slowly, insert a pin that is slightly smaller than the die bore, dipped in buffing or polishing compound, into the die. Move the pin back and forth and repeat the process until the die land is acceptable. It is recommended that both ends of the pins are rounded off and the pin gauge set clearly designated for cleaning purposes only (not requiring calibration).
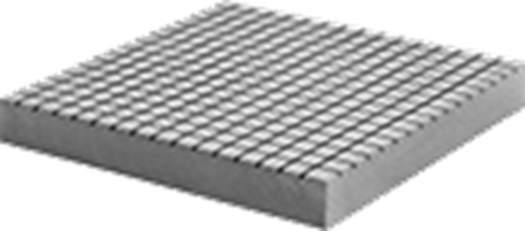
To achieve a clean die exit, (figure c) the face of the die can be refaced using a lapping plate (figure d) and buffing or polishing compound. This will become more necessary with usage (time) as the die anneals from repeated cleaning cycles. Until the die starts to show excessive wear, facing the die will extend its lifetime.
An additional consideration for die care must be the fit between the die and the die holder (part of the crosshead). The tolerances for these two mating parts are on the order of a few thousandths of an inch, so any wear on either part can lead to leakage around the die. This often leads to more than just an inconvenient mess as any leaks can compromise process stability.
It should also be noted that die lines are not always a result of the die quality, and all downstream contact points should be evaluated. These could include any water bath or vacuum sizing entrances and exits, any guides or hold downs, and possibly cutter bushings. I have seen a major focus on die quality just to find out that the lines in the tubing were the result of calcium buildup in air wipes (due to poor water quality).
The documentation system should allow for tracking all components. All dies should be serialized (or otherwise identified) so they can be tracked. After each use and cleaning cycle each die must be inspected, and this should be documented. Any dies that are deemed unacceptable must be segregated (quarantined) until disposition is completed. This may be rework, repair or scrapping. Additionally, visual standards should be developed and maintained. As noted above, a system such as a Keyence VHX can take images that can be imported directly into a word document. It is important to link these to the visual standards and the tubing defects.
© Copyright Extrusion Consulting, Inc., 2021. All rights reserved.

